


Why Gmail Blocking Matters for Your Privacy and Inbox
How to ban emails on gmail is simpler than you might think. Here's the quick answer:
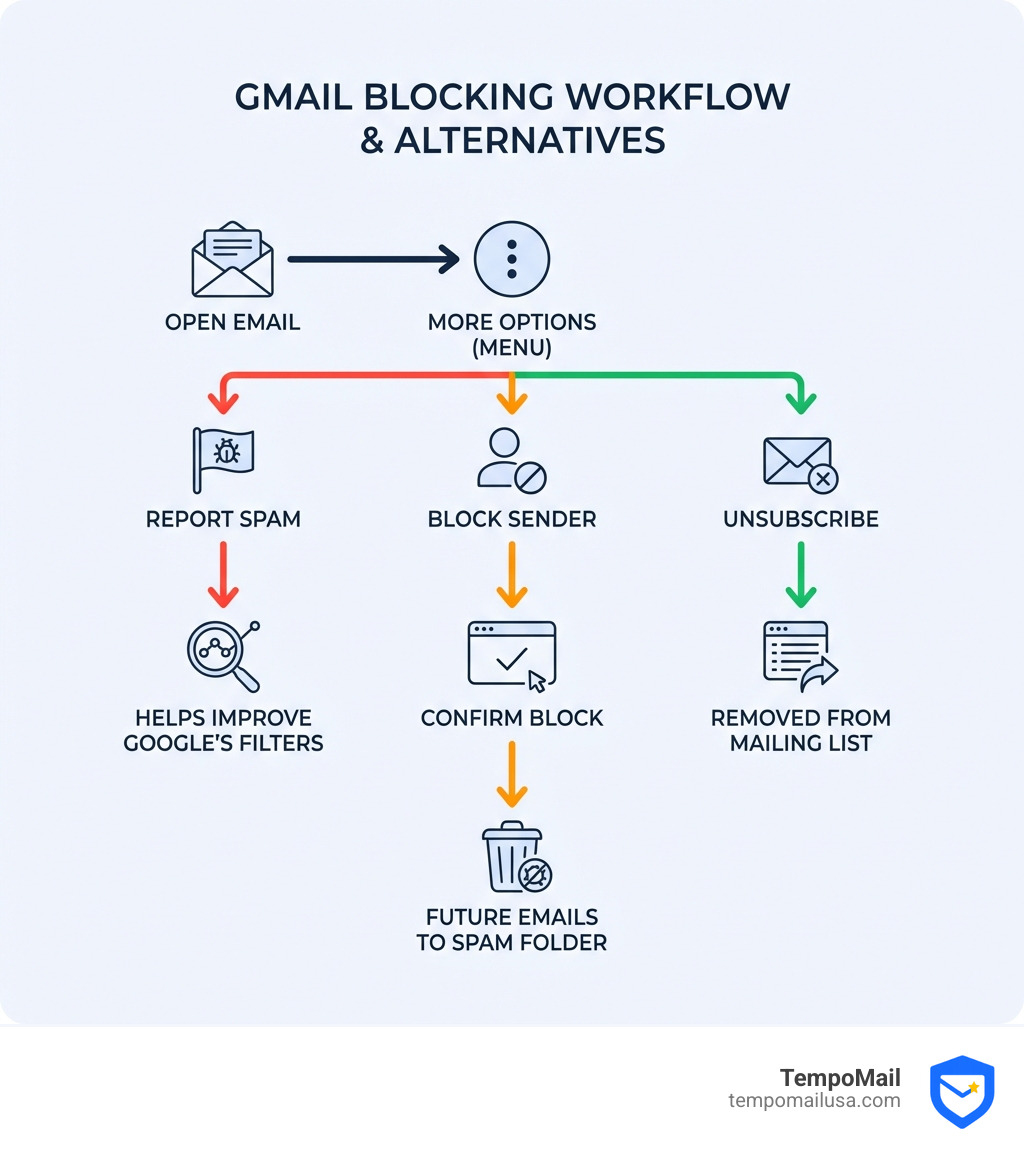
Desktop: Open the email → Click the three dots (More menu) → Select "Block [sender]" → Confirm
Mobile: Open the email → Tap the three dots → Select "Block [sender]" → Confirm
Once blocked, all future emails from that sender automatically go to your Spam folder. The sender won't be notified.
If your inbox feels like a landmine of "CONGRATULATIONS!!! YOU'VE WON" and promotional emails you never signed up for, you're not alone. Unwanted emails don't just clutter your inbox—they can expose your personal information, slow down your productivity, and even put you at risk of phishing scams and malware.
Blocking senders in Gmail is your first line of defense. It keeps your inbox organized, protects your privacy, and ensures you don't miss important messages from people who actually matter. Unlike simply deleting emails manually, blocking stops future messages before they ever reach you.
The difference between blocking, reporting spam, and unsubscribing matters too. Blocking sends future emails straight to spam. Reporting spam helps Google improve its filters. Unsubscribing removes you from legitimate mailing lists. Each serves a different purpose, and knowing when to use each one can save you hours of inbox management.
I'm Mohammad Waseem, and I've spent years building and managing web-based tools, including temporary email platforms that help users protect their personal information from unwanted exposure. Through testing anti-spam systems and optimizing email workflows, I've learned exactly how to ban emails on gmail and keep your digital identity secure.
How to Ban Emails on Gmail: Step-by-Step Guide (Desktop & Mobile)
When we talk about how to ban emails on gmail, we are essentially talking about the "Block" feature. This feature is a powerful tool in your digital arsenal. It doesn't just hide a single message; it creates a rule for your account. Once you apply this to a sender, Gmail acts as a digital bouncer, intercepting any future attempts that person or company makes to reach your primary inbox.
The beauty of this system is its discretion. The person on the other end has no idea they have been blocked. They won't receive a "delivery failed" notification or a "you are blocked" message. Their emails simply disappear into the Spam folder, where they are automatically deleted after 30 days. This is particularly useful for dealing with persistent individuals or low-level automated bots where you want to avoid the drama of a confrontation.
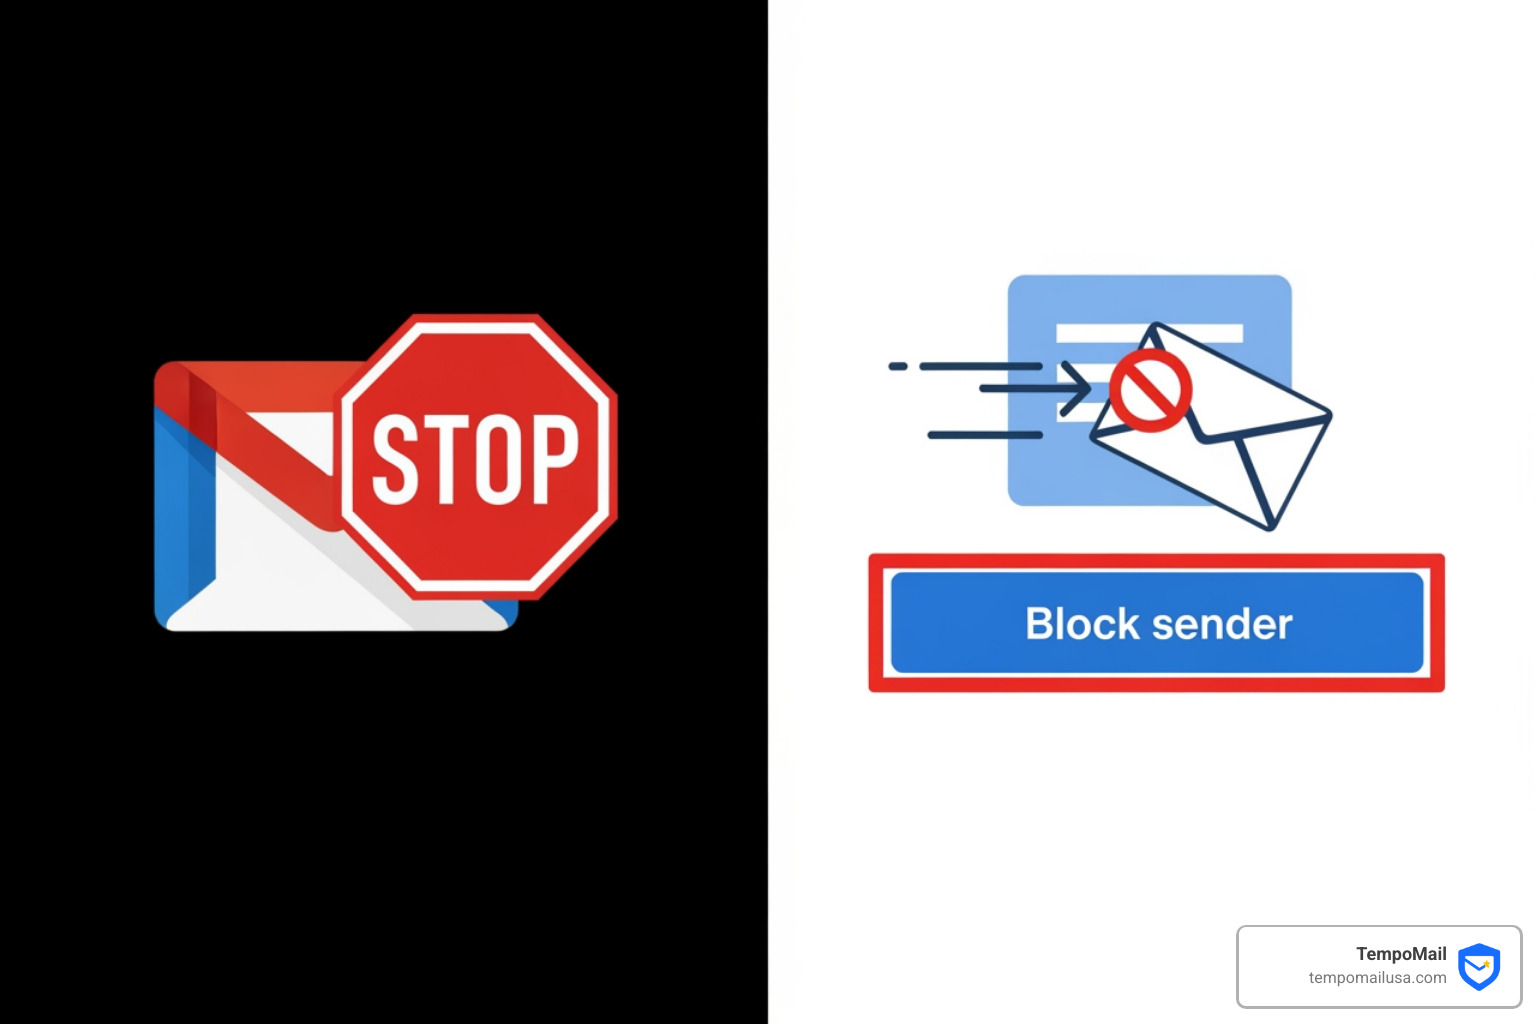
To get started, you can follow the official documentation on Block an email address in Gmail or follow our detailed walkthrough below.
How to ban emails on Gmail using a desktop browser
For those of us who do the bulk of our work on a laptop or desktop, the web interface of Gmail offers the most straightforward way to manage senders. Whether you are using a Mac, PC, or Chromebook, the process is identical.
- Open Gmail: Steer to your inbox and find the offending email.
- Open the Message: Click on the email to open it.
- Locate the "More" Menu: In the top right-hand corner of the email pane (right next to the "Reply" arrow), you will see three vertical dots. This is the "More" menu.
- Select Block: Click those dots. A dropdown menu will appear. Near the bottom, you will see the option: Block "[Sender Name]".
- Confirm the Action: A confirmation dialog box will pop up. It will explain that future messages from this sender will be marked as spam. Click the Block button to finalize.
If you realize you made a mistake immediately after clicking, a small grey bar will appear at the bottom of your screen with an "Undo" option. If you miss that, don't worry—we will cover how to manage your blocked list in a moment.
How to ban emails on Gmail using the mobile app
We are often on the go when a pesky notification hits our phone. Fortunately, the Gmail app for Android and iOS makes it just as easy to silence these senders.
- Launch the App: Open the Gmail app on your smartphone or tablet.
- Select the Email: Tap the message from the person you want to block.
- Find the Dots: This is where it gets slightly tricky. There are two sets of "three dots." Do not click the ones at the very top of the screen (next to the Archive and Trash icons). Instead, look inside the email message, next to the sender's name and the reply button.
- Tap Block: Tap those three dots and select Block "[Sender Name]".
- Confirmation: The app will handle the rest, moving the current message to spam and ensuring all future ones follow suit.
Managing Your Blocked List and Unblocking Senders
Sometimes we get a little "block happy." Maybe you blocked a retail store during a moment of inbox-clearing rage, but now you actually want that 20% off coupon they just sent. Or perhaps you blocked a former colleague but now need to coordinate on a project. Knowing how to manage your list is just as important as knowing how to ban emails on gmail.
To see everyone you have ever blocked, you need to dive into your Gmail settings. This is currently only possible through a desktop browser.
- Open Settings: Click the gear icon in the top right corner of Gmail.
- See All Settings: Click the "See all settings" button.
- Filters and Blocked Addresses: At the top of the settings page, you will see several tabs. Click on the one labeled Filters and Blocked Addresses.
- Review the List: Scroll down to the bottom of this page. You will see a section titled "The following email addresses are blocked. Emails from these addresses will appear in Spam."
- Unblock Senders: You can either click "Unblock" next to an individual address or check the boxes for multiple senders and click Unblock selected addresses.
Once unblocked, future emails will return to your primary inbox. However, unblocking doesn't automatically pull their old emails out of the Spam folder; you'll have to go into the Spam folder and move those manually if you still need them.
Blocking vs. Spam vs. Unsubscribe: Which Should You Use?
One of the biggest points of confusion for users is knowing which tool to use for which problem. Using the wrong one can be ineffective or, in some cases, even signal to a scammer that your email address is active.
| Action | When to Use It | What Happens |
|---|---|---|
| Blocking | Personal harassment, specific persistent individuals, or a company that won't stop emailing. | Future emails go to Spam. The sender is unaware. |
| Reporting Spam | "Nigerian Prince" scams, random "CONGRATULATIONS" emails, or obvious junk. | Moves email to Spam and sends a report to Google to improve their global filters. |
| Unsubscribing | Legitimate newsletters, stores you've shopped at, or services you no longer use. | The sender is asked to remove you from their list. Required by FTC regulations. |
| Reporting Phishing | Emails pretending to be your bank, Amazon, or Netflix to steal your password. | Alerts Google's security team to a malicious site or sender trying to steal data. |
The "Unsubscribe" Rule
If the email is from a legitimate company (like a major retailer or a news site), you should use the Unsubscribe link. Federal Trade Commission (FTC) regulations require commercial emails to have a working unsubscribe link. Gmail often places its own "Unsubscribe" button right next to the sender's name at the top of the email to make this easier.
The "Spam" Rule
If you don't recognize the sender at all and the content looks like junk, Report Spam. This doesn't just help you; it helps the entire Gmail community by training Google's AI to recognize that specific junk mail pattern.
The "Phishing" Rule
If an email looks like it's from a trusted source but feels "off"—perhaps it's asking for your Social Security number or a password reset you didn't request—do not just block it. Use the Report Phishing option found in the "More" menu. This helps Google shut down malicious domains.
For more information on what constitutes a violation of user safety, you can review Gmail's Program Policies.
Advanced Inbox Control: Mass Blocking and Phishing Reports
If you're dealing with a massive influx of unwanted mail, clicking "Block" on every single message is like trying to empty the ocean with a teaspoon. In these cases, we need more advanced tactics.
Using Filters for Mass Blocking
Gmail doesn't have a "Mass Block" button, but you can create a filter that acts as one.
- In the Gmail search bar, click the Show search options icon (the sliders icon on the right).
- In the "From" field, you can enter multiple email addresses separated by the word
OR(e.g.,spammer1@email.com OR spammer2@email.com). - Click Create filter.
- Check the box for Delete it.
- Click Create filter.
Now, any email from those addresses will bypass your inbox and your spam folder entirely, going straight to the Trash. This is the most efficient way to handle a list of known "bad" senders.
Handling Cyber Harassment
If someone is using Gmail to harass, intimidate, or threaten you, they are in direct violation of Gmail's Program Policies. While blocking stops the messages, it doesn't solve the underlying safety issue.
Important: If you feel you are in physical danger or the harassment is severe, contact your local authorities immediately. Many jurisdictions have specific cyber harassment laws. You should also keep a record of the emails (don't delete them!) as evidence before you block the sender.
Frequently Asked Questions about Gmail Blocking
Can I mass block email addresses in Gmail?
While there is no native "select all and block" button, the best way to mass block is by using the Filter method described above. By creating a filter with multiple "From" addresses and selecting "Delete it," you effectively ban those emails. There are also third-party Chrome extensions like "Block Sender" that can add a one-click mass block utility to your browser, though we recommend sticking to native Gmail features for the best security.
Does blocking an email address take effect immediately?
Generally, yes. However, Google notes that it may take a few days for the block to fully propagate across all of their servers. If you see one more email from a blocked sender an hour after you blocked them, don't panic—the system is likely just syncing. Once it takes effect, the redirection to the Spam folder is automatic.
Do I need to block senders separately for different Gmail accounts?
Yes. Blocking is account-specific. If you have a work Gmail and a personal Gmail, and the same annoying person is emailing both, you will need to perform the block action in each account individually. There is no "global block" that carries over between different Google identities. This is a key part of Google's privacy management, ensuring that settings for one identity don't bleed into another.
Conclusion
Mastering how to ban emails on gmail is an essential skill for anyone who wants to maintain digital peace. By using a combination of blocking, reporting spam, and setting up filters, you can transform a chaotic inbox into a streamlined workspace.
At TempoMail USA, we believe that the best way to deal with spam is to prevent it from ever reaching your real inbox in the first place. We operate in the cybersecurity and privacy industry, providing identity proxying services that act as a firewall for your digital life.
Instead of giving your real Gmail address to every website that asks for it, you can use our secure aliases. These aliases protect your Personally Identifiable Information (PII) from being sold to data brokers or leaked in breaches. If an alias starts receiving spam, you don't even have to worry about blocking—you just delete the alias. It’s the ultimate way to maintain Anti-spam tracking and online safety.
Take control of your inbox today. Start by blocking those who shouldn't be there, and protect your future by being careful about who gets your address next.